Pages

Friday 31 May 2013

Retirement List 2013

A very quick post today to let you know about the Stampin' Up! retirement lists.
Click on the picture below to see the retiring stamps list
 

and on this picture for the retiring accessories 


If you would like to place an order please contact me (details on the 'Contact me' tab above) and I'll be happy to help.
Orders delivered to your door are £4.95 
or can be collected from me free of charge.

Do pop back tomorrow when I will be taking part in the ILWS 'Last Chance Blog Hop'


Monday 27 May 2013

More Backgrounds


Apologies for the late post today but housework and gardening called - isn't it a shame that these things get in the way of crafting? :0)
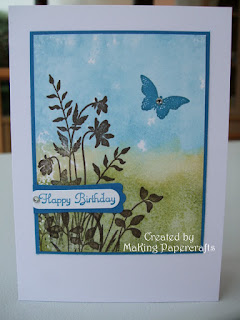
Anyway this evening I found some cardstock that I had been playing with the other day using the clear block background technique so I rustled up these two cards. If you read my post the other day you will know that I used rubbing alcohol for those backgrounds but these were done with good old fashioned water. Using water does mean they take much longer to dry - hence why I forgot all about them. I won't bore you with the details as you can use any colours and stamp sets you fancy, I just used what I did because I hadn't put them away!!
As I am off work this week my posts may be a little erratic as I have a list of things I need to do but I will be back.

Sunday 26 May 2013

Simples Sunday for the men


 A very quick card with a very quick post today. I realised this morning, after quite a busy weekend so far, that I hadn't made a card for my Simples Sunday this week. So I hurried off to my craftroom to come up with something that was very easy to make and here it is.
It is a 10cm square Basic Gray card base with a strip of Basic Gray DSP across the card, stamped with a sentiment. I then cut two panels of cardstock, rounded the edges and ran through the Big Shot in the Perfect Polka Dots Embossing folder before fixing to the card with dimensionals. The button was cut with the Sweet Buttons Embosslits with a piece of Bakers Twine tied in the middle. Five minutes - job done!!
Must rush as it is my Grandsons second birthday party this weekend, this time for family, and hopefully it will be a bit quieter than the one he had for his friends on Friday :0)
Have a great weekend and I'll be back soon x

Friday 24 May 2013

Playing with backgrounds


Yesterday I had a little play making backgrounds with clear blocks. I have used this technique a few times in the past but a fellow demo, Lynne Fahey, has recently done a video tutorial on this technique and it spurred me on to have another go. Lynne's tutorial can be found here.

Lynne used water to spray the block but, as my only spritzer bottle is filled with rubbing alcohol I used that for these cards. A word of advice - if you haven't tried this technique before I would advise using water as the alcohol tends to disperse the ink a little too much and can leave white spaces. I quite like this random effect but it would not be to everyone's taste!
The card at the bottom (with the tree) was spritzed with SU's Smooch Spritz which gave a shimmery finish seen better in the photo below (but also left a lot more white patches!!)
Go on, have a go - the worst that can happen is you waste a bit of cardstock :0)


Thursday 23 May 2013

Card Swap Group - May


When I got home from work today this beautiful handmade card was waiting for me, made by Aileen.
Aileen is a regular visitor to my blog and always leaves such lovely comments and I feel so guilty because I don't get round to repaying the compliment as often as I would like. However maybe I can make up for that a little bit by urging you to pop over and have a look at Aileen's blog which can be found here.
Aileen has done some embossing on this card which can be seen much better in the photo top right and decorated the inside of the card as well (bottom right).
A gorgeous card Aileen, thank you I love it!

Wednesday 22 May 2013

Card Swap Group - Birthday card


It was Zoe's birthday last week so now I can safely show you the card I sent her. Zoe is a member of the card swap group, and also a SU demo, and her favorite colours are purples - hence the Elegant Eggplant! I used the Field Flowers stamp set (and whoops I got the bud the wrong way up!) along with a couple of sentiments and stamped in Elegant Eggplant, Wisteria Wonder and Old Olive. I cut a ribbon border from DSP with the Dotted Scallop Ribbon Border Punch and added a butterfly punched with the Bitty Butterfly punch. The sentiment on the stem was punched with the Jewelry Tag punch and the other with the Oval punch matted onto a Wisteria Wonder Scallop Oval. I added a bit of diagonal scoring in the top right hand corner to add a bit of texture and finished the card off with a few Basic Pearls. Hope you had a great day Zoe!

Tuesday 21 May 2013

Explosion Boxes


These are the little gifts I made for the ladies who attended my class last week (and of course one for my sister who always comes to help me!) They are made from Island Indigo, Baja Breeze and Old Olive cardstock and decorated with co-ordinating DSP from the Twitterpated pack. Inside are butterflies punched with the Elegant Butterfly and Bitty Butterfly punches and Basic Rhinestones. As you can see they hold a battery operated tealight which had also been decorated with DSP and a tiny butterfly from the Beautiful Wings Embosslit die.

If you would like to order any of the supplies shown or anything else from the catalogue (links to current catalogues on my side bar) then please do not hesitate to contact me and I will be happy to help. My contact details can be found on the tab at the top of the page. 
Or maybe you have considered becoming a Stampin'Up! Demonstrator yourself - if so, now is the time to join us. 
If you join before 30th May 2013, you'll be able to take advantage of Stampin' Up's 25th anniversary promotion. For your £99 outlay, you will get to choose a whopping £155 worth of products to put in your starter kit! You'll get business stationery and catalogues worth £45 on top of that and the whole thing will be delivered to your door for free!

If you join now your first quarterly minimum is not to be reached until the end of September 2013.  We have a new catalogue launch before then so  you would benefit from seeing the new catalogue and the products a month before everyone else and be able to place a pre-order too!

Why not contact me for a no-obligation chat?

Monday 20 May 2013

Punch Art Super Heroes


As promised here is the punch art Super Heroes card I have made for my Grandson who will be five next week. At the moment he is Superman mad but is also quite keen on Batman and Robin. I found the punch art Batman & Robin on Splitcoaststampers done by someone called A.Fairchild. To my knowledge he/she has no blog so I cannot point you in any direction but that's who the credit must go to. Superman was found on a blog but the author did not not know who she had CASE'd it from so I am unable to credit the originator of this one.
It is made mainly with the Owl Builder punch (is there anything you can't make with this punch I ask myself!) but also uses the Extra Large Oval, Bird Builder and Circle punches. They are mounted onto frames cut with a die from the Labels Collection Framelits, paper pierced around the shape and the dots joined together with marker pens. The '5' is cut with the Typeset Alphabet Bigz die and the 'today' from the Timeless Type Junior Alphabet die (now retired).
That's all for now but I'll be back tomorrow to show you some little explosion boxes.


Sunday 19 May 2013

Less is More - Cats!


Having said in my Simples Sunday post, earlier today, that I was going to have a few days off from blogging here I am back already!!!! When I saw the LIM challenge this week was 'Cats and/or Dogs' I thought I was scuppered as I don't own any stamps that would fit the challenge. However not to be beaten I decided a bit of punch art was called for and this is what I have come up with. I can't take credit for the idea of the punch art cats as they have been stalking around blogland for a very long time but these are my versions. Mostly made with Circle punches of varying sizes but with the addition of the heart noses from the Owl Builder and the ears from the Blossom Builder punches.
The sentiment is from A Word for You. Just to add a little texture to the card I diagonally scored lines in the top right and bottom left corners and added a couple of Glimmer Paper hearts.
I am currently working on a Super Heroes punch art card for my Grandson's 5th birthday so, as soon as I have finished it, I will be back to show you. Until then enjoy the rest of the weekend x


(Fairly) Simples Sunday


Today's card is one I made a few weeks ago but thought it would fit the Simples Sunday as it was fairly simple to make. I took a piece of Whisper White cardstock and lightly drew around the outside of one of the Apothecary Accents Framelits in pencil, Then using the Summer Silhouettes stamp set I stamped three flowers in Raspberry Ripple then covered them using my pre-cut post-it note masks before stamping the leaves in Certainly Celery. (Tip: after cutting masks for stamps don't throw them away, stick them to the inside of the stamp box and you can re-use them several times) With this particular stamp set, to save time, you can stamp directly over the leaves providing the flower is a fairly strong colour and the leaves are not too dark. The centres of the flower are stamped in Early Espresso and the sentiment is from Field Flowers. Once the stamping was done I placed the die back on using the pencil line as a guide, fixed in place with a post-it and ran through the Big Shot. A length of Raspberry Ripple Stitched Satin ribbon was placed across a panel of cardstock then fixed to a card blank and the stamped die cut was fixed using dimensionals. I added a few Basic Pearls to finish the card.
I will be taking a break from blogging for a few days as I haven't had a lot of crafting time just recently but I will be back soon.

Friday 17 May 2013


I first saw this technique a few weeks ago on the Less is More challenge site but unfortunately I didn't have time to try it for that particular challenge. However I still wanted to have a go and it was an ideal opportunity when I needed a card for a work colleague.
This technique (no idea what it's called) is not the easiest but Lizy Bartaby did a brilliant tutorial on her blog so, if you'd like to have a go, you can see her post here.
I used Fabulous Florets with Raspberry Ripple and Old Olive plus a couple of retired stamps, the Itty Bitty Butterfly punch and the Typeset Alphabet Bigz die for the lettering.The ribbon is Raspberry Ripple Stitched Satin. I also made a bottle tag in the same design but with the recipients name but forgot to take a photo of that!!
Hopefully back tomorrow for the LIM challenge - where has that week gone????


Thursday 16 May 2013

Labour of Love!


This is my 'labour of love' card that I was working on last week - called that because of the excessive amount of time it took to make!! It's an oversized card, an A3 piece of card folded to make a card which is A4, made for a work colleague who is leaving and it needed to be large so that everyone can sign it. I used Chocolate Chip for the mat with diagonal score lines across the top right and bottom left corners with Chocolate Chip butterflies stamped on the central plain section. I then used the large scallop oval die to cut Crumb Cake Cake cardstock and a smaller oval die for the Very Vanilla mat stamped with four butterflies, from the SAB set Bloomin' Marvelous, in Crunb Cake. I then punched four butterflies with the Bitty Butterfly punch in Vellum cardstock to overlay the stamped butterflies and added a Basic Pearl to each one. The flowers were made from Very Vanilla cardstock with the Boho Blossoms Punch and Blossom Party die. Leaves were punched from Certainly Celery with the Bird Builder punch. I finished the card with a computer generated sentiment cut into a banner and three Basic Pearls across the top right corner. I made a bag to put the card in which is pictured on the right.
Tomorrow I will be back to show you my card that was made for the same lady.


Wednesday 15 May 2013

A Chocolate Treat


Last week I showed you a card I had made with some 'leftovers' (picture below) and today I'm showing you a treat box which was made to match.

I needed a small gift for a work colleague and, having already made the card, I decided to make a matching box to hold a small box of chocolates.
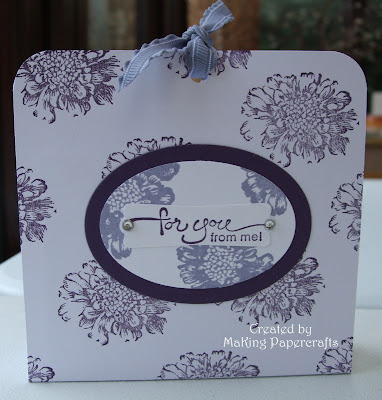
The box is made with some sturdy white cardstock (non SU) and decorated with stamps from Field Flowers in Elegant Eggplant and Wisteria Wonder. The sentiment is from A Word For You, punched with the Decorative Label punch and finished with a couple of Basic Rhinestones.


Tuesday 14 May 2013

Another Aperture


A card very similar to yesterday's but I have used Summer Starfruit for this one. The aperture is cut with one of the Window Frames Collection dies and uses another of the stamps from Fabulous Florets.
I stamped the flowers in Versamark onto Summer Starfruit cardstock and embossed using clear embossing powder before fussy cutting them. The leaves this time are again from the Bird Builder punch but in Chocolate Chip. I added a knot Summer Starfruit Stitched Satin ribbon and a Basic Pearl in the flower centres. There's no sentiment on today's card as I'm not sure what I want yet!
Tomorrow I have a 3D item to match a card I showed you last week.

Monday 13 May 2013

Using Apertures


I was inspired to make this card by one I saw on Lizy Bartaby's blog who is a fellow Pink Lady. It is not case'd just 'inspired by' this gorgeous card (here) that Lizy entered into last week's LIM challenge. Don't just stop at that card though, take a look at the rest of Lizy's lovely creations.
For my card I cut the aperture using a die from Apothecary Accents Framelits and fixed a piece of Cherry Cobbler DSP onto the base card so it would show through the aperture. Taking one of the images from Fabulous Florets, I stamped some images in Versamark and heat embossed them using clear embossing powder. Then, on a scrap piece of card, I stamped three more flowers and this time embossed with Cherry Cobbler, before fussy cutting them. The aperture panel was then fixed to the card blank using dimensionals before arranging the Cherry Cobbler flowers and adding some Certainly Celery leaves, punched from the Bird Builder punch. I finished the card by stamping a sentiment from Bring on the Cake onto the DSP.
Tomorrow I have another aperture card to show you, using the same stamp set but in a different colour and a different shaped die.

Saturday 11 May 2013

LIM One Layer Revisited! (and Simples Sunday)

 
I said I might be back for the LIM 'One Layer-Coloured Card Blank' challenge and here I am! A really simple card (or should I say cards) this time using Summer Starfruit cardstock, stamps from Just Believe and Teeny Tiny Sentiments stamped in Staz-on. Then finished off with some scoring using the Borders Scoring Plate.
As it was so easy I made this variation on a theme but, this time, using Island Indigo cardstock with the same frame stamp but a different sentiment (also from teeny Tiny Sentiments). I inked the stamps first with Versamark and then with Night of Navy and heat embossed using clear embossing powder.
Edited to add - My apologies if you came to see a Simples Sunday card, I thought I had scheduled one but I was wrong! This card fits the bill though because it really is very simple!!!


LIM One Layer


Good morning everyone - what happened to summer? Last weekend it was a t-shirt, this weekend it's a jumper and fleece!!
As always the first thing I do on a Saturday morning is look at the challenge over at LIM which, this week, is a One Layer card with a Coloured Card Blank. My first attempt was using More Mustard but I wasn't happy with that one so I did another using Sahara Sand which I was much happier with. Sahara Sand is a colour I rarely use for some unknown reason and I can only describe it as somewhere between grey and kraft but with a hint of green (and one which doesn't show up too well in photos!).
I used some masking on this card and started by stamping the flower, from Fabulous Florets, in Raspberry Ripple. I then added post-it note masks onto the flower and in a strip across the card before stamping the leaves in Old Olive. After removing the masks I drew two lines across the card (where the post-it mask had been) with a Raspberry Ripple marker pen and then scored some lines on either side. The sentiment, from Bring on the Cake, was stamped in Raspberry Ripple and I added a bit of shading to the leaves with a Sahara Sand marker and a bit of sparkle to the flower with Dazzling Diamonds.
I have a lot of jobs to catch up on today but, when I've finished those, I could well be back with another card for the challenge - watch this space :0)
Until next time, have a great weekend and keep warm!!


Related Posts Plugin for WordPress, Blogger...