Pages

Monday 30 April 2012

Last Day for Cupcakes!


Yes it's the very last day you can get your hands on the lovely Create-a-Cupcake set from the Spring Mini - nobody knows whether this will be available in the future so, if you really want it, there is NO time to waste!
I was asked to make a personalised birthday card with cupcakes on it so this is what I've come up with. I started by stamping the name in Wisteria Wonder, using the Varsity Alphabet set and my Stamp-a-ma-Jig, along the bottom of a piece of Whisper White cardstock. The cake cases were then stamped on top of each letter in Pretty in Pink and the Perfect Plum Bow added. The frosting on the cakes was done with a variety of different methods - Heat'n'Stick with Dazzling Diamonds, clear embossing and silver embossing - and then cut out by hand (there is a co-ordinating punch to go with the set but unfortunately I don't have it!) After adding some decorations they were set aside until the rest of the card was finished. I stamped the sentiment from the Happiest Birthday Wishes Hostess set down the LH side and tied a knot of Wisteria Wonder Ruffled ribbon next to it before matting onto Wisteria Wonder cardstock and then onto a DL card blank. The frostings were then positioned onto the cakes using dimensionals and a few randomly placed Basic Rhinestones were placed underneath the letters.
With the 'going out' of the Spring Mini there comes the brand new Summer Mini which starts tomorrow. There is an ILWS Blog Hop, starting at 10a.m, to celebrate it's launch with lots of inspiring projects to show you - so come back tomorrow (oh and set aside a few hours to do all that blog hopping!)

Saturday 28 April 2012

Sneak Peak Sketches


For the Less is More challenge this week Chrissie & Mandi have given two sketches with the instruction there must be lots of white space. This is something I definitely don't have a problem with, the more CAS the better for me, so I launched into making 4 cards for the challenge. It also gave me an opportunity to give you a sneak peak of a lovely new SU stamp set coming very soon!
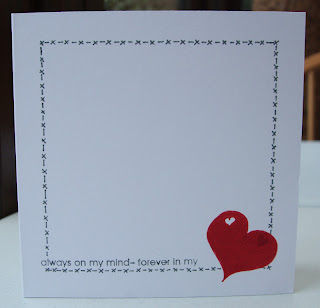
I won't bore you with all the details other than to say the colours I used were Rose Red, Perfect Plum, More Mustard and Basic Black with a mixture of sentiments.
Back soon x

Perfect Pairs!


The challenge at Simply Stampin' this week is 'Perfect Pairs!' and this fitted in really well with a card I've been asked to make. For those of you who saw my attempt at a 'tacky' engagement card the other day well this is for the same recipient but from a different person. (the sister loved the card so asked me to make another one for her Mum to send!) I always find it difficult to make cards for the same person, as I'm constantly thinking about making something completely different, but to be asked to make two 'tacky' cards for the same person is a step too far :0) This card is a bit more bling-y than tacky I think but it fits the challenge perfectly. A pair of hearts, a pair of Modern Label punches and a pair of rhinestones.
I started by using a stamp from Confetti, inked with Versamark then sprinkled with Heat'n'Stick before adding Dazzling Diamonds - this made my border which was matted onto Basic Black cardstock and a knot of Whisper White Organza ribbon tied round before placing down the side of an A6 card blank. I inked the heart stamp (now retired) with Versamark and heat embossed one in black and added Heat'n'Stick and Dazzling Diamonds to the other and then punched with the Large Heart punch. The black one was stuck onto the border and the glittery one was positioned on top, raised with dimensionals. The 'congratulations' was again heat embossed in black and punched with the Modern Label punch and matted onto another label in Basic Black with a Basic Rhinestone placed at either end. The rest of the sentiment (a new one coming soon) was stamped in Basic Black.

Tuesday 1st May sees the launch of the first ever Summer Mini catalogue which has some exciting new products in it. To celebrate the launch a group of crafters from ILWS, myself included, have organised a Blog Hop to showcase some of the brand new products so why not drop by then and have a look at, what promises to be, some inspiring projects. I'm sure I'll be back before then but just wanted to give you advance warning :0)
Have a great weekend and try not to get too wet!!!!

Friday 27 April 2012

Silver Wedding


Another special celebration card, this time for a silver wedding anniversary. The inspiration for this came from Gill, a fellow 'Pink Lady' SU demo, and her card can be seen here.
I started by making an A5 card blank with plain white cardstock and, onto this, matted a panel of Brushed Silver cardstock. Onto a slightly smaller piece of Whisper White I stamped two of the stamps from Wedding Sweet and the sentiment in Versamark and then heat embossed in silver. The 25 was cut from Brushed Silver cardsock with the Timeless Type Junior Alphabet dies, and I used Vicky's brilliant idea of cutting more than one layer and glueing them together to make them thicker. Two tiny hearts were added just below the sentiment and these were punched with the Owl punch. A small bow of (non SU) ribbon was placed to the right of the numbers and the card was finished by adding some Basic Rhinestones dotted around the card. The top left picture shows the box I made to put the card in 9made up as I went along!) and I used an embossed heart, punched with the Large Heart and run through the Vintage Wallpaper Embossing folder, as a closure for the flap.

Thursday 26 April 2012


A bit of a strange one today! I was asked by a colleague to make an engagement card for her sister and when I asked what she wanted she said 'Tacky' (very quickly followed by the statement - I know you don't do tacky!) This was then changed to 'anything a bit over the top will be fine'. Now regular visitors to my blog will know very well that I don't do 'over the top' either so this was going to be very difficult. Having finished a card which I thought was a bit OTT I actually quite like the finished effect so I'm not too sure the recipient will but this is about as far as I could go!
I started with a DL card blank made with Cherry Cobbler and matted on a piece of the shiny spotty DSP from Holly Berry Speciality (which has not surfaced since Christmas). I then took a piece of Very Vanilla cardstock and punched three sets of hearts with the Heart of Hearts punch and tied a knot of Cherry Cobbler Seam Binding around one end before fixing onto the DSP. I punched one of the largest hearts in Cherry Cobbler and layered a Very Vanilla heart, which had been run through the Perfect Polka Dots Embossing Folder, on top and fixed this onto the card with a dimensional. You won't recognise the sentiment yet, but watch out for some brand new SU products coming very soon.
Don't forget that none of the items in the Spring Mini will be available after 30th April so you only have a few days left to get anything you really want before it goes.

Wednesday 25 April 2012

Cheeky Monkey!


A few weeks ago when I was on my 'punch art' fad I came across this cute little monkey which I just had to try. Before blogging it I have spent ages searching to try to find the originator and do you think I can find it again? If anyone can help then please let me know so that I can give credit.
The monkey was made with various round and oval punches (all SU) and the leaves are from the Bird Builder punch. The shed wall is just a piece of Crumb Cake cardstock with lines drawn with a Chocolate Chip marker and cut at angles at the top and the window frame is the Word Window punch. A retired sentiment was punched with the Modern Label punch and 'hung' with some Linen Thread.

Tuesday 24 April 2012

Decorated Tins


I decorated a tin to give as a small gift to a friend and she asked me if I would make another two, one purple and one red, for friends of hers - so here they are. The lid of the tin was covered with DSP from the Paper Stacks, one in Elegant Eggplant and the other in Real Red, then the edges were lightly sanded to get rid of the rough edges before inking with a sponge dauber. The names were cut with the Timeless Type Junior Alphabet dies in Perfect Plum and Cherry Cobbler with leaves from the Bird Builder punch in Certainly Celery and flowers from the Itty Bitty Punch Shapes Pack and a rhinestone added to the centre. The tiny heart in between the K & T is from the Owl Builder punch.

Monday 23 April 2012

Mickey & Minnie Treat Bags


My grandchildren went off to Disneyland yesterday, along with another family who have two daughters, so I made them these little treat bags for the journey. I did have an attempt at doing a front view but didn't get on very well so plumped for a rear view - so much easier! Made with the largest SU circle punch and the 1" punch in Basic Black and Minnie's bow is the butterfly punch with the spots drawn on with a Real Red marker. As far as I know Mickey doesn't wear a bow tie but he's got one anyway! The silhouettes were glued onto a folded Top Note and fixed at the top of a cellophane card bag which had been filled with jelly beans.

Sunday 22 April 2012

Simply Stampin' meets the Friday Mashup


Two challenges in one today - Simply Stampin' which is a colour challenge using Very Vanilla, Soft Suede, Pink Pirouette and Marina Mist (more on this later!) and also the Friday Mashup which is a sketch mashed up with Versamark ghosting. Now I did try to do the ghosting technique with ghostly results (sorry ghastly!) so no mashup just the sketch. I thought I may as well use the colours in the SSC and that's where I got it wrong - it should have been Marina Mist but I had it in my head that it was Pacific Point so that's what I used. Never mind Friday Mashup I think I am suffering from Brain Mashup. Anyway onto the card - I started with a Soft Suede card blank matted with Very Vanilla which had been stamped with a flower from Growing Green. Tht tag is cut with the Two Tags die in Pacific Point and the overlay piece in Pink Pirouette with a piece of Soft Suede Taffeta ribbon tied around and a flower from the Boho Blossoms punch added on one side, the sentiment & spray is from Tiny Tags and punched with the Jewelry Tag punch. The flower at the top is made from 6 of the smallest petals on the Blossom Petals punch and 6 of the next size up, all in Pink Pirouette, with a circle in the centre. I saw the idea for this on Mary Fish's site, Stampin'Pretty, but my flower is very different from hers and much smaller. The petals were punched out and then I curled then round a scoring tool to shape them - I am pleased with how it turned out but it is very fiddly and time consuming so I don't think I'll be making many more :0) 
Enjoy the rest of your weekend and come back tomorrow to see some really easy Disney treat bags.

Saturday 21 April 2012

How Charming!


How Charming! is the title of the Less is More challenge this week and the ladies have asked that we use a charm on our cards. I have to admit that this is not something I use and the only time I can remember using them are for some christening cards I made some time ago. It just so happens I had one of the crosses left so I thought it was about time I revisited the christening gown cards that I have made in the past. This one is different in so much as it is a lot smaller and is not personalised (I have put the baby's name along the bottom using die cut letters before). Not really much to tell you about this other than I cut the dress from some fairly sturdy white card, making it up as I went along because the template I had made before was too big, ran the bottom bit of the dress through the Perfect Polka Dots Embossing folder and added a narrow strip of embossed card down the sleeves, really to take the plainness off. The flowers were punched with the Itty Bitty Shapes Pack flower punch and positioned around the neckline, with a small Basic Pearl in the centre. The ribbon tied around the top of the skirt is Whisper White Organza and the cross was stitched onto the knot in the ribbon with white cotton.
I've just looked at this post and it looks like the dress is stuck onto some sort of cream card blank so just to clarify - it is a free standing 'dress' card and the cream colour is just the paint on my shelf and walls!!!
Well I did manage to get a card done for one of the challenges today meaning 2 posts in one morning - oh dear I really must get on with some other jobs now. See you soon x

Mocha Morning Thank You's


 A really quick post today as I must get on and do some other things! Some easy thank you cards using the Mocha Morning Speciality DSP, the Elegant Thank You stamp for the two cards bottom right and a stamp from Oval All for the rest. The Elegant Thank You was punched with the Scallop Square punch and the others with the Oval punch and matted onto a Scallop Oval. The leafy branch is punched from the Bird Builder punch and the flowers are from the Itty Bitty Shapes Punch pack with a Basic Pearl in the centre.
I am hoping to get a card made for the Less is More and Simply Stampin' challenges sometime over the weekend so do pop back and see if I've managed it! Until then have a great weekend and if the sun is shining, like it is here at the moment, make the most of it :0)

Friday 20 April 2012

Birthday lunch


No card to show you today but something very delicious! My lovely (and very clever) sister arranged a surprise lunch for myself and some friends yesterday to celebrate my birthday (it was earlier in the week but Thursday is my day off!) On the menu - a twice baked cheese souffle served with green leaves, walnuts, grapes and pomegranate and dressed with balsamic vinegar - accompanied by warm, homemade bread (sorry I broke my bread up before I remembered to take the photo!) and for dessert, a vanilla panna cotta with a de-constructed rhubarb crumble served with fresh double cream. Sorry to disappoint you but I forgot to take a photo of this until AFTER I'd eaten it but, believe me, it was fabulous!
I count myself really lucky to have such a lovely, thoughtful sister - and even better cos she's a fantastic cook :0)

Thursday 19 April 2012


Another Punch Art card to show you and this is my attempt at Snoopy. Again there are several versions out there in blogland and all slightly different so impossible to credit the originator. My Snoopy was made with ovals, circles and the Blossom Petals punches with Whisper White and Basic Black and his kennel with Real Red cardstock which was embossed first with the Stripes Embossing Folder. The card blank was sponged with Certainly Celery and Bashful Blue and stamped with a stamp from Pocket Silhouettes before the dog and kennel were glued in place. Part of a sentiment stamp was coloured with a Real Red marker and punched with the Modern Label Punch.

Wednesday 18 April 2012


A very quick post today showing you a card made with the Heart to Heart punch. The base card is River Rock with Early Espresso matted on top and then Very Vanilla on top of that. The sentiment was made using two stamps, coloured with an Early Espresso marker - unfortunately the 'love' stamp is now retired but several other sentiments could be used in it's place or it could be computer generated. Several hearts were punched with the Heart to Heart punch from Very Vanilla cardstock and then run through the Perfect Polka Dots Embossing Folder before positioning randomly onto the card. Some Basic Rhinestones were added to give a bit of sparkle.

Tuesday 17 April 2012


Another simple card, this time using the Ornament Punch as a vase. The colour scheme is Perfect Plum DSP matted onto Elegant Eggplant cardstock with Perfect Plum Taffeta ribbon tied around and knotted. The vase is made by simply punching out with the Ornament Punch and trimming off the bottom point. The flowers are punched with the Boho Blossoms and Itty Bitty Shapes punches with Certainly Celery leaves from the Bird Builder punch. The card was finished off by adding a few Basic pearls and a tag punched with the Jewelry Tag punch.

Monday 16 April 2012


This card is 'sort of'' case'd from Dawn Griffith, an American SU demo, using her idea but different supplies. For my card I used Old Olive DSP from the Brights Paper Stack for the backing and a strip of Certainly Celery and Whisper White cardstock, punched at the bottom with the Scallop Border punch, to go across the card. The flowers were cut with the 5-Petal Flower punch and the centres with a circle punch and rounded to give a raised effect. The sentiment is from the Hostess set Happiest Birthday wishes stamped in Old Olive. A simple but effective card which could be done in any number of colours using any DSP - I think I may be making some more of these!
Back to work today so maybe not quite so many cards to show you over the next few days but I'll try my best :0)

Sunday 15 April 2012

Challenging Doodles!


Oh dear Chrissie & Mandi at LIM really are challenging us this week with their One Layer Card with Doodles!!!!
Now, whilst I love cardmaking and papercrafts, drawing is definitely NOT one of my talents - even my doodling consists of squares and triangles. Anyway here are two cards I have come up with and I'm not proud of either of them but thought I would share them with you anyway!
I decided to use my 'doodles' in place of words so a heart on the first one and a smiley face on the second. I inked the part of the sentiment stamps that I wanted with a marker pen and also drew the heart and face with markers. Once this was done I doodled a 'dots and kisses' border with a Basic Gray marker. The heart started out as an outline with a tiny heart drawn in the top right but then I decided it would look better coloured in however, as you can see, it didn't quite cover the original heart - it actually looks like it should be there though so I'm not going to worry about it! Can't really say much more other than plenty of white space and yes, this very definitely was a challenge :0)

Saturday 14 April 2012

Simply Stampin' Sketch - again


Whilst having a grand clear up in my craft room I came across the two pieces of DSP that I messed up when making my first card for the Simply Stampin' Sketch challenge this morning, so I decided I would have another go and use the reverse spotty side. I matted the panels onto Basic Gray cardstock and positioned them onto a white card blank. I cut two flowers from the Blossom Party die in Pink Pirouette and, after curling them slightly, layered one on top of the other and glued them onto the central panel. The other two flowers are punched with the Boho Blossoms punch - all the flowers have DSP centres cut with a circle punch and the leaves are punched from Old Olive with the Bird Builder punch. The banner is a strip of Whisper White and Old Olive cardstock, cut at the end, with the retired sentiment stamped in Old Olive and three Basic Pearls added.

5 S's?


Wondering about the title of my post today? Well it's the Simply'Stampin Sketch challenge using Simply Soft! Go on humour me :0)
I used panels of DSP from Nursery Nest (one of the packs offered free with orders over £45 during April) and stamped the image from the Simply Soft Hostess set in Always Artichoke and then matted these onto slightly larger panels of Always Artichoke cardstock. These were then attached to a card blank and a border, punched with the Dotted Scallop Ribbon Border punch, positioned across the panels. The sentiment was stamped onto Whsisper White and punched with the Word Window punch then matted onto a tag from the Lots of Tags dies with a piece of Baker's Twine threaded through the top.
Another very simple card - or it should have been if I'd had my brain in gear! I had three attempts at stamping one of the panels before I got it right as I got ink on the edge of the stamp - twice (you would think I would have learnt the first time wouldn't you?) and then cut the DSP wrong. Oh well I got there in the end and maybe now I should get on with the hundred and one jobs I need to do before going back to work on Monday. 
Have a great weekend and come back soon x
Related Posts Plugin for WordPress, Blogger...